MOPEKS® Guide to the Stores - View Dynamic Trials
Introduction
This section, in brown italic font, appears in many places on this website for completeness - so you can skip it in future!
The purpose of this Guide is to show you how to actually use the computer program MOPEKS. If you are not a computer programmer, please read 'Guide ⇨ Basic Principles' first.
If you are a computer programmer, please read 'Guide ⇨ Key Concepts' followed by 'Guide ⇨ How it Works'. You could even buy and read 'The Book' but that may be a step too far.
You can then experiment by actually running the program MOPEKS.
Firstly, download and install MOPEKS as explained in 'Downloads ⇨ MOPEKS Program'.
Then start it up! When you encounter the Advice form (see 'FAQ ⇨ List of Forms ⇨ Form Advice') please read what it has to say. If it has any "red" content then there is a problem and you will have to do your best to solve it with the help of the 'Troubleshooting' section. By all means send me the error log if that happens - see 'Guide ⇨ Quality Control'
Assuming there are no problems, press the green "continue" button on the Advice form and you will encounter the Wizard, which is oriented towards actions. Then press the green continue button to go straight on to Reception which is oriented towards locations. Both of these forms are merely different routes to the same thing - you can regard them as being navigational aids.
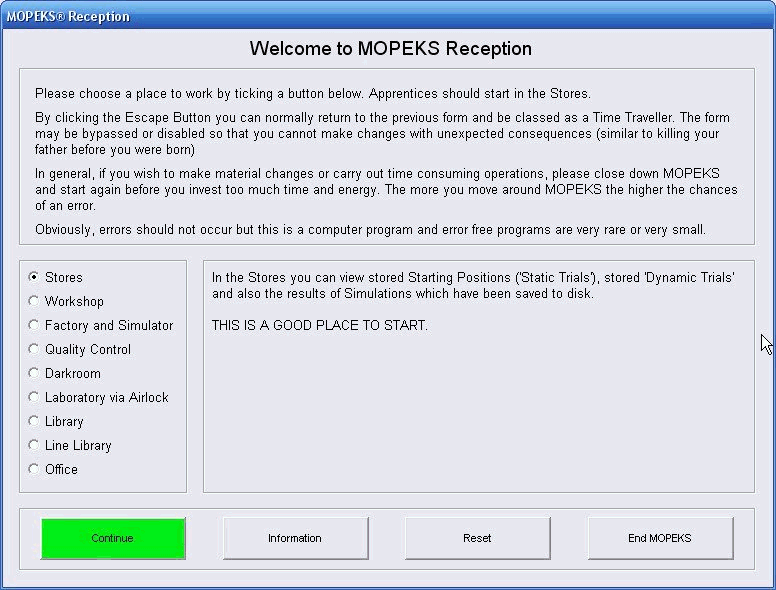
Press the appropriate radio button until the Reception form looks like below. Now read what it has to say carefully - MOPEKS is complicated. It may look like a game but it is not.
 Left click on image for a full size shot in a new tab or window. Press F11 for a full screen, if you wish. Then F11 again to return
End of brown italic section!
Continue
Now ensure that "Stores" is selected and press the green "Continue" button. At this point the Stores form should appear.
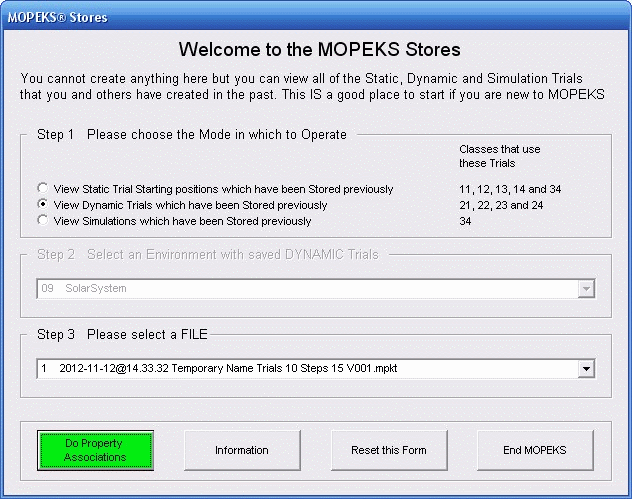
A 'Dynamic Trial' specifies the movement of a number of objects in a particular environment. You can examine both the data and see the actual visual representation by just clicking on the file concerned as explained in 'FAQ ⇨ General Q6'. In this section, however, we will see how to do it the hard way!
Press buttons until it looks like the screen shot below!
Left click on image for a full size shot in a new tab or window. Press F11 for a full screen, if you wish. Then F11 again to return
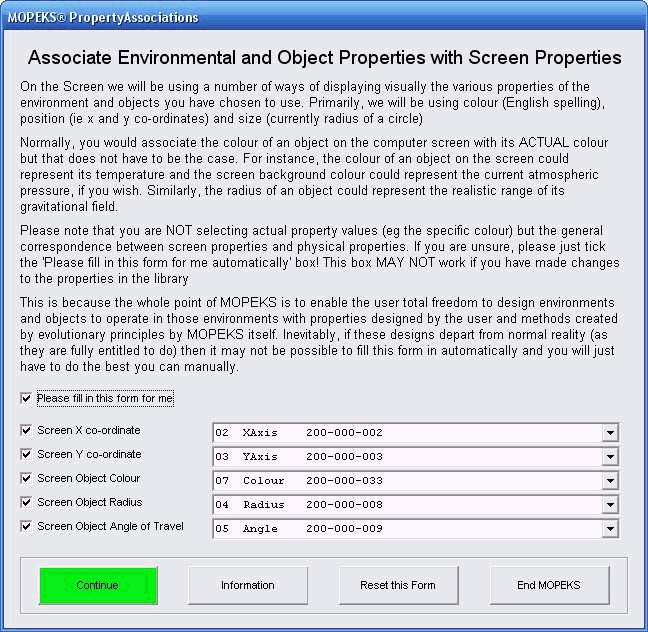
When you are ready, press the green "Do Property Associations" button and the Property Associations form will come up as below. This form is explained at much greater length in FAQ ⇨ General ⇨ Q7) but the explanation on the form itself should really be sufficient if you are just looking around.
Left click on image for a full size shot in a new tab or window. Press F11 for a full screen, if you wish. Then F11 again to return
Continue
When you are happy, press the green 'Continue' button and your entire screen should fill as below. To move back, you can use the escape button.
You will find that the tiny 'Trial Player' form is translucent and can be moved round the screen or almost right off it if you wish.
In this particular example, our hero, Gordon, is going to attempt to use the gravitational effect of all of the objects in order to hit the target which is also moving.
He must also avoid hitting any of the other celestial objects on the way.
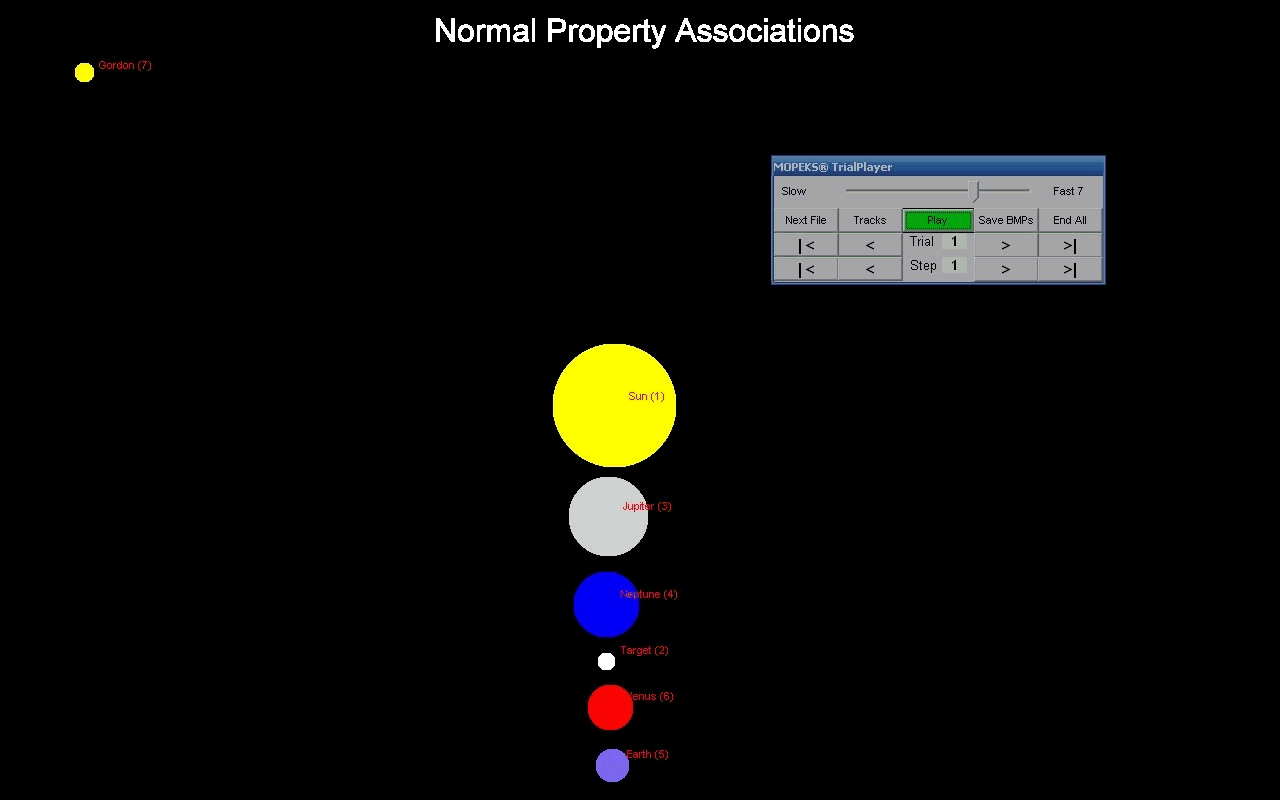 Left click for ANIMATED gif. Then Save Image to Disk and Step through as a Movie if you wish - see 'FAQ ⇨ General ⇨ Q9'
Trial Player - Play Button
You will notice that the Trial Player form is now a lot more elaborate than when we looked at Static Trials. If you press the "Play" button you will see the objects moving.
Trial Player - Slow Fast Slider
You can vary the speed of playback by adjusting the position of the slider.
Trial Player - Tracks Button
By default, the player shows the previous position of an object as a dot but you can change this by pressing the "Tracks" button.
Trial Player - Trial Buttons ('|<', '<', '>' and '>|')
In this particular files there are 10 different trials and you can examine and play each one of them at your leisure
Trial Player - Step Buttons ('|<', '<', '>' and '>|')
In each of the 10 trials in this file you can step through each consecutive position or even jump to the end and work backwards. Going backwards may be a little slow because it does not really go backwards - it actually plays the whole file up to the previous point!
Trial Player - Next File Button
By pressing the "Next File" button you can cycle through all of the examples which are held in the appropriate folder (but not if you have opened a file by clicking on it). In this particular case:
C:\MOPEKS\Factory\Trials\SolarSystem\View Dynamic
in case you wish to copy and paste:
 Left click on image for a full size shot in a new tab or window. Press F11 for a full screen, if you wish. Then F11 again to return
Trial Player - Save BMPs Button
By pressing the "Save BMPs" button you can save each position on the screen as a bitmap file. These are saved as below. This facility was really for my benefit during testing but you are welcome to use it if you wish. That is why it is rather crude and the files may well overwrite if you leave them in situ so be careful. The files always go into this folder:
C:\MOPEKS\Factory\Movies
in case you wish to copy and paste:
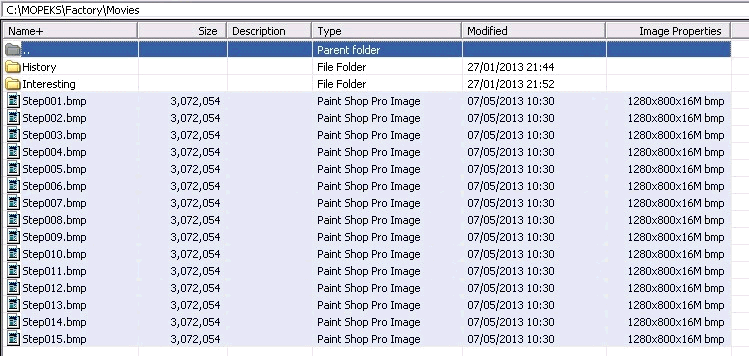 Left click on image for a full size shot in a new tab or window. Press F11 for a full screen, if you wish. Then F11 again to return
The bitmap files in the movie folder above can be turned into a full move or an animated gif if you wish. The animated gif below is minute compared with the files that compose it. This is because bitmap files are an extremely precise but inefficient way of storing information.
See 'FAQ ⇨ General ⇨ Q8' and 'FAQ ⇨ General ⇨ Q9' and for more information on animated gifs.
Trial Player - End All Button
When you are playing a Trial, pressing this button will stop the sequence. When no trial is playing, pressing this button will end MOPEKS.
MOPEKS® and the Blue Logo are the Registered Trademarks of the MOPEKS Organisation
Website Published: 15th October 2013
Program Launched: 2nd November 2013
Copyright © MOPEKS Organisation 2013. All rights reserved
'MOPEKS Organisation' is the Trading name of Mopeks Ltd a company registered in England under number 07519676
The robot docking station is here
here