MOPEKS® Guide to the Library - Background
Introduction
This section, in brown italic font, appears in many places on this website for completeness - so you can skip it in future!
The purpose of this Guide is to show you how to actually use the computer program MOPEKS. If you are not a computer programmer, please read 'Guide ⇨ Basic Principles' first.
If you are a computer programmer, please read 'Guide ⇨ Key Concepts' followed by 'Guide ⇨ How it Works'. You could even buy and read 'The Book' but that may be a step too far.
You can then experiment by actually running the program MOPEKS.
Firstly, download and install MOPEKS as explained in 'Downloads ⇨ MOPEKS Program'.
Then start it up! When you encounter the Advice form (see 'FAQ ⇨ List of Forms ⇨ Form Advice') please read what it has to say. If it has any "red" content then there is a problem and you will have to do your best to solve it with the help of the 'Troubleshooting' section. By all means send me the error log if that happens - see 'Guide ⇨ Quality Control'
Assuming there are no problems, press the green "continue" button on the Advice form and you will encounter the Wizard, which is oriented towards actions. Then press the green continue button to go straight on to Reception which is oriented towards locations. Both of these forms are merely different routes to the same thing - you can regard them as being navigational aids.
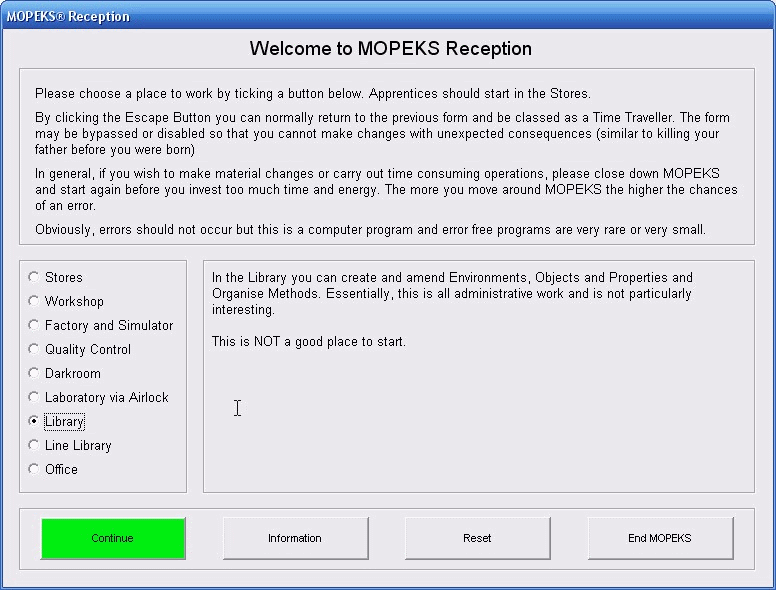
Press the appropriate radio button until the Reception form looks like below. Now read what it has to say carefully - MOPEKS is complicated. It may look like a game but it is not.
 Left click on image for a full size shot in a new tab or window. Press F11 for a full screen, if you wish. Then F11 again to return
End of brown italic section!
Continue
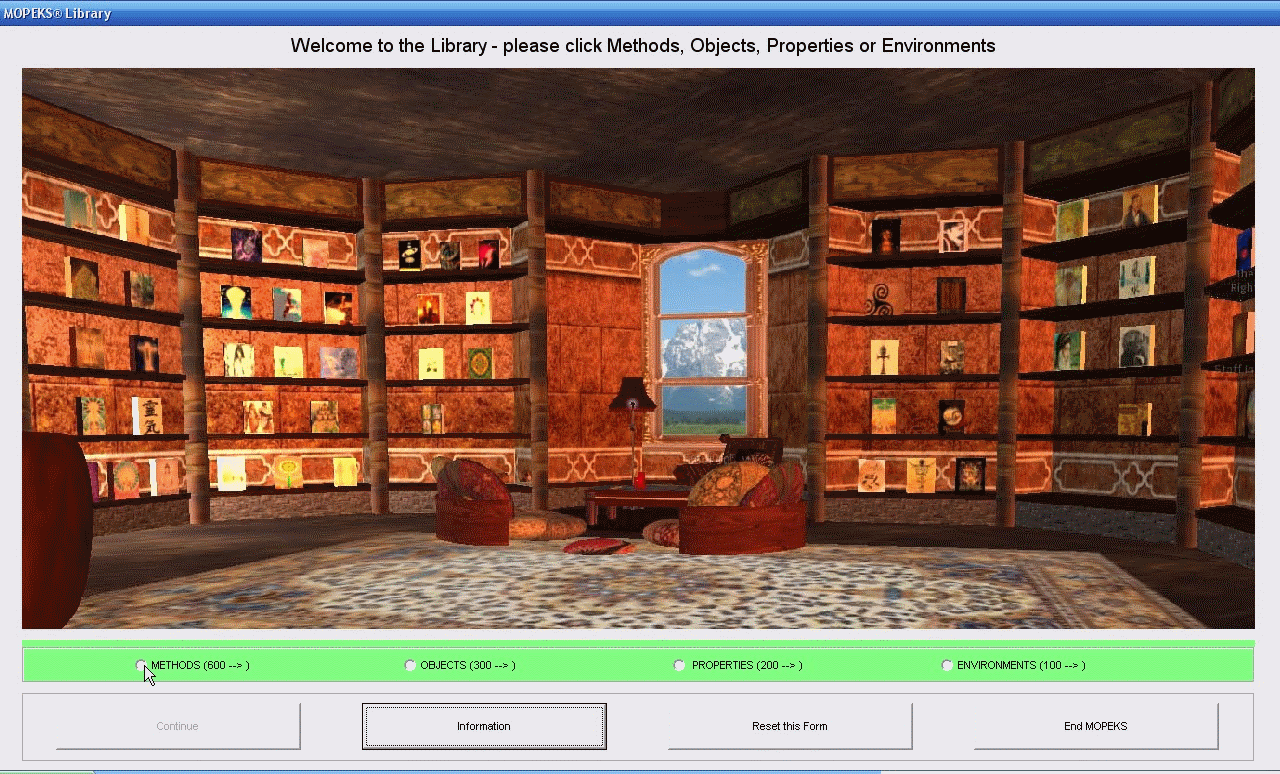
When you press the green 'Continue' button in Reception, the Library form will come up as in the screen shot below.
[Note: I "borrowed" this Library image off the web - if you own the copyright please let me know and I will give you an acknowledgement or change it if you are really upset]
Then press the radio button labelled 'METHODS (600⇨)', with the pale green background, and you will see the inside of the Library.
Once you are inside the Library, press the radio buttons labelled 'OBJECTS (300 ⇨)', 'PROPERTIES (200 ⇨)' and 'ENVIRONMENTS (100 ⇨)' in succession. This process is illustrated in the animated gif (left click on image below)
 Left click for ANIMATED gif. Then Save Image to Disk and Step through as a Movie if you wish - see 'FAQ ⇨ General ⇨ Q9'
Organisation
The library is organised into four main sections, namely Methods, Objects, Properties and Environments. These separate sections are apparent from the animated gif above.
Methods
You can carry out the following tasks in the Methods section. The numbering system starting at zero is the default position for controls on a form and can be a source of confusion (for me at any rate):
0. DELETE this Method from the Library
1. AMEND this Method's DESCRIPTION ONLY in the Library
2. COPY this Method FROM the Library TO the Factory Store
3. ADD this Method TO the Library FROM the Factory Store
Objects
You can carry out the following tasks in the Objects section:
0. DELETE this Object from the Library
1. AMEND this Object's DESCRIPTION ONLY in the Library
2. MAKE a further COPY of this Object in the Library
3. CREATE and ADD a new Object to the Library - you can edit later
4. ADD A METHOD to this Object in the Library
5. CHOOSE a SECONDARY OBJECT for a Class 22 Method of this Object
6. REMOVE A METHOD from this Object in the Library
7. ADD A PROPERTY to this Object in the Library
8. SET A VALUE in a PROPERTY of this Object in the Library
9. REMOVE A PROPERTY from this Object in the Library
Properties
You can carry out the following tasks in the Properties section:
0. DELETE this Property from the Library
1. AMEND ALL of this Property's Values in the Library
2. CREATE a further COPY of this Property in the Library
3. CREATE and ADD a new Property to the Library
Environments
You can carry out the following tasks in the Environments section:
0. DELETE this Environment from the Library
1. AMEND this Environment's DESCRIPTION ONLY in the Library
2. MAKE a further COPY of this Environment in the Library
3. CREATE and ADD a new Environment to the Library - you can edit later
4. ADD A METHOD to this Environment in the Library
5. ATTACH or DETACH a METHOD to this Environment in the Library
6. REMOVE A METHOD from this Environment in the Library
7. ADD A PROPERTY to this Environment in the Library
8. SET A VALUE in a PROPERTY of this Environment in the Library
9. REMOVE A PROPERTY from this Environment in the Library
10. ADD AN OBJECT to this Environment in the Library
11. REMOVE AN OBJECT from this Environment in the Library
Actions
The various actions you can carry out are mostly handled identically for Methods, Objects, Properties and Environments but not always.
Please see the separate sections listed under 'Guide ⇨ Library' above for detailed guidance.
MOPEKS® and the Blue Logo are the Registered Trademarks of the MOPEKS Organisation
Website Published: 15th October 2013
Program Launched: 2nd November 2013
Copyright © MOPEKS Organisation 2013. All rights reserved
'MOPEKS Organisation' is the Trading name of Mopeks Ltd a company registered in England under number 07519676
The robot docking station is here
here